The realm of custom printing has unlocked endless creative opportunities, and UV DTF (Ultra-Violet Direct-to-Film) Type B transfers are a game-changer. These transfers enable crafters and businesses to produce vibrant, long-lasting designs on hard surfaces like tumblers, mugs, glassware, and more, without needing complex equipment.
So, in this blog we will explain how to use a UV DTF Type B without a printer, offering a straightforward method to create stunning UV DTF wraps, stickers, and decals.
What Does UV DTF Mean?
UV DTF, or Ultra-Violet Direct-to-Film, refers to a printing technique using UV-cured inks to apply designs onto a specialized film, which is then transferred to hard surfaces like glass, metal, ceramic, or plastic.
Unlike traditional DTF (Direct-to-Film) transfers that require a heat press for fabric, UV DTF Type B uses a peel-and-stick method, making it ideal for UV DTF cup wraps and UV DTF printer stickers on non-porous surfaces.
What does UV DTF stand for?
It stands for a process that creates waterproof, scratch-resistant, and vibrant UV DTF decals. UV DTF Type B comes pre-printed with an adhesive layer, eliminating the need for a UV DTF printer for cup wraps or other equipment.
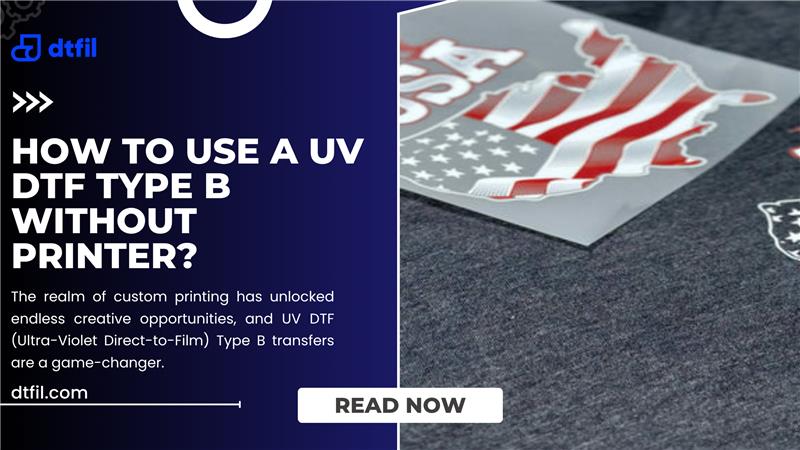
These transfers are perfect for UV DTF printing on items like tumblers, pens, or even car surfaces (yes, can UV DTF go on cars?—it can, with proper application). They are also dishwasher-safe UV DTF stickers when applied correctly, offering durability for everyday use.
Why Use UV DTF Type B Without a Printer?
Opting for pre-printed UV DTF Type B transfers is ideal for those without access to a UV DTF printer. Here’s why this method excels:
-
No Equipment Required: No need for costly printers UV DTF or laminators; the transfers are ready to apply.
-
Versatile Applications: Perfect for UV DTF wraps on curved or uneven surfaces like mugs, tumblers, or phone cases.
-
Long-Lasting Durability: UV DTF stickers are scratch-resistant, water-resistant, and can last 3-5 years with proper care.
-
Simple Application: The UV DTF process uses a cold-peel method, requiring no heat for a seamless peel-and-stick application.
-
Cost-Effective: UV DTF gang sheets allow multiple designs on one sheet, reducing costs.
This no-printer UV DTF guide is best for beginners, hobbyists, or small businesses looking to create professional UV DTF cup wraps or decals without investing in a UV DTF printer for cup wraps.
Materials Needed for UV DTF Type B Application
To begin working with UV DTF printer paper or pre-printed UV DTF film, gather these essentials:
-
Pre-printed UV DTF Type B film sheets: Order from trusted suppliers with your designs and adhesive layer included.
-
Clean, smooth surface: Suitable for items like ceramic mugs, glass tumblers, stainless steel bottles, or plastic cases.
-
Lint-free cloth: For surface cleaning.
-
Rubbing alcohol: To remove dust, oils, or residue.
-
Squeegee or credit card: To smooth the transfer during application.
-
Scissors: For cutting UV DTF film into desired shapes.
-
Optional heat gun: For slight warming to improve adhesion (not mandatory).
Source high-quality UV DTF printer paper from online retailers or local suppliers offering UV DTF printing services. Quality films ensure vibrant colors and strong adhesion for professional results.
Step-by-Step Guide: How to Use a UV DTF Type B Without a Printer

Follow these steps to master the UV DTF process and create stunning UV DTF wraps and decals:
Step 1: Order Your UV DTF Design
Purchase pre-printed UV DTF Type B transfers from a reputable supplier like DTFIL. Submit your artwork via their platform, selecting UV DTF gang sheets for multiple designs or individual UV DTF transfers.
Ensure the design matches your item’s dimensions (e.g., a UV DTF cup wrap should fit the cup’s height and circumference). Use tools like Adobe Illustrator or Canva for high-resolution, precise artwork.
Step 2: Prepare the Surface
A clean surface is essential for adhesion. Wipe your item (e.g., tumbler, mug, or car surface) with a lint-free cloth and rubbing alcohol to remove dust, oils, or fingerprints. Dry thoroughly. Avoid alcohol-based cleaners on frosted or coated surfaces to prevent interference with the UV DTF adhesive.
Step 3: Cut the UV DTF Film
Trim the UV DTF printer paper into the desired shape using scissors. For UV DTF cup wraps, measure the item’s dimensions and cut the film to fit, leaving a small border for easier handling. If using UV DTF gang sheets, carefully cut out individual designs to preserve their quality.
Step 4: Peel the Backing
Carefully peel off the backing layer of the UV DTF Type B film to reveal the adhesive side. Avoid touching the adhesive to prevent reduced bonding. The peel-and-stick UV DTF process requires no additional glue, as the adhesive is pre-applied.
Step 5: Position the Transfer
Align the UV DTF transfer on your item. Start by placing one edge of the adhesive side onto the surface, ensuring proper alignment. For curved surfaces like UV DTF for tumblers, apply slowly from one side to the other to avoid wrinkles or bubbles. UV DTF stickers are hard to reposition once applied, so take care with placement.
Step 6: Smooth the Transfer
Use a squeegee or credit card to press the UV DTF wrap onto the surface. Work from the center outward to eliminate air bubbles. For UV DTF cup wraps, roll the item slowly while pressing to conform to the curve. Apply even, firm pressure for a secure bond.
Step 7: Apply Pressure
Press the UV DTF sticker with your palm for 3-5 minutes to activate the adhesive with body heat. This strengthens the bond, making it easier to remove the carrier sheet.
Step 8: Peel the Carrier Sheet
Slowly peel off the top carrier sheet at a low angle, leaving the UV DTF decal on the surface. If any parts lift, press them back down and re-peel carefully. Smooth out any remaining bubbles with your fingers.
Step 9: Optional Heat Application
While not required, a low-setting heat gun can enhance adhesion for UV DTF wraps. Gently warm the transfer for 10-15 seconds, keeping the heat gun 6 inches away to avoid damage. This is especially useful for high-use items like tumblers or UV DTF on cars.
Step 10: Final Smoothing
Run your fingers or a squeegee over the UV DTF transfer to ensure full adhesion. Check for bubbles or lifted edges and press them down. Wait 24 hours before washing to allow the adhesive to set.
Also Read : How Much Do DTF Transfer Flyers Cost? Find Out Now!
What’s the Difference Between UV DTF and DTF?

Understanding UV DTF vs DTF is key. DTF (Direct-to-Film) transfers are designed for fabrics and require a heat press, while UV DTF is tailored for hard surfaces using a cold peel UV DTF process.
What is the difference between DTF and UV DTF? UV DTF uses UV-cured inks for vibrant, durable UV DTF decals that adhere to non-porous surfaces without heat, making it ideal for UV DTF cup wraps and UV DTF printer stickers. DTF, on the other hand, is fabric-focused and less versatile for hard surfaces.
How to Remove UV DTF from Glass?
To remove UV DTF from glass or other surfaces, follow these steps:
-
Gently peel off the UV DTF sticker starting from a corner. Use a plastic scraper to avoid scratching.
-
Apply rubbing alcohol or a mild adhesive remover to loosen the adhesive.
-
Wipe clean with a lint-free cloth.
-
Wash the surface with soap and water to remove residue.
Avoid excessive force to prevent damage to the surface.
Tips for Success with UV DTF Type B
-
Practice First: Test the UV DTF process on a small item to perfect your technique.
-
Choose Suitable Surfaces: UV DTF wraps work best on smooth, non-porous materials like glass, ceramic, or metal.
-
Store Properly: Keep UV DTF printer paper in a cool, dry place to preserve adhesive quality.
-
Avoid Stretching: Don’t stretch UV DTF cup wraps during application to prevent design distortion.
Conclusion
Mastering how to use a UV DTF Type B without a printer opens up a world of creative possibilities. With pre-printed UV DTF transfers, you can craft vibrant UV DTF cup wraps, UV DTF stickers, and decals without expensive equipment like a UV DTF printer. This UV DTF usage guide simplifies the cold peel UV DTF process, delivering professional, durable results for beginners and experts alike. Whether you're wondering how to make UV DTF wraps, how to make UV DTF cup wraps, or how to print UV DTF stickers, this method is cost-effective and versatile.
At DTFIL, let’s explore pre-printed UV DTF Type B transfers, UV DTF gang sheets, and custom UV DTF designs. Visit us to create stunning, durable prints that shine with precision and vibrancy today!
FAQs
Q: Can you do DTF without a DTF printer?
No, DTF printing needs special inks and film that only DTF printers support. Regular printers can't bond powder or cure designs for transfers.
Q: What do you need to print UV DTF transfers?
You'll need a UV DTF printer, UV-curable inks, laminating film (A/B film), a UV lamp, and your design file to print and cure durable transfers with vivid detail.
Q: Do you need a special printer for UV DTF?
Yes, UV DTF requires a UV flatbed printer designed to handle UV inks and A/B film layers. Standard inkjet or DTF printers aren't compatible with this process.
Q: What can UV DTF be put on?
UV DTF can be applied to glass, wood, plastic, acrylic, metal, ceramics, and more basically any smooth, hard surface that doesn’t absorb regular ink.
Read More Blogs: